
 Here's how I did it. I think it's called reverse applique. First, I got some cheap shirts at Walmart. Then I had my baseball fabric and some fusible interfacing.
 Start by removing the pocket on the shirt if there is one. My shirt didn't have a pocket, but his size did. It's much easier without the pocket! They really sew those babies on there!
 Here is the after: (You can definitely see where the pocket was, but I ironed it and then it was fine)
 I used Publisher (have I mentioned I love that program?) to make a number 4 the size and font that I wanted. I printed it out and cut around it, so I had a stencil.
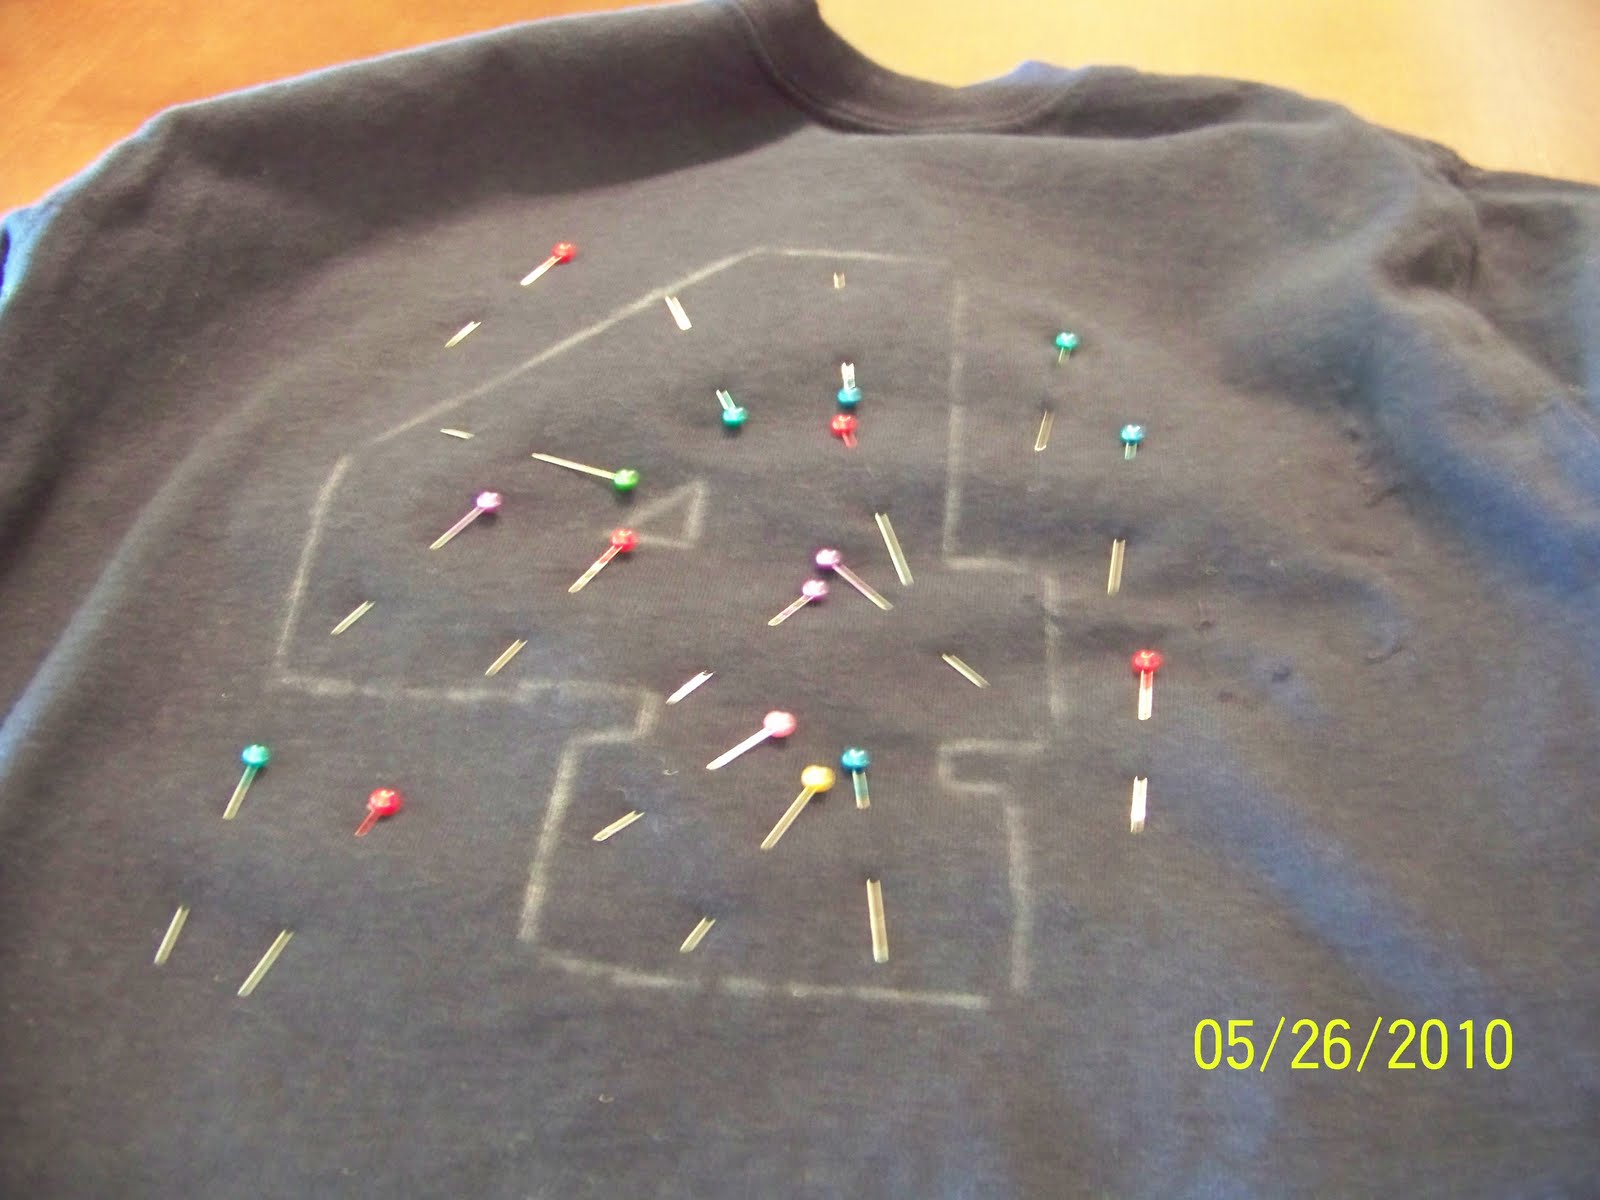
 Place the "stencil" on the shirt where you want the number and trace around it with a washable fabric pen (The best things are washable crayons in my experience. I have several different washable pencils specifically for sewing and they aren't good)

 Now cut a piece of the ball fabric that is larger than the number/design you want on your shirt. I allowed lots of extra space just to be safe.
 Iron the fusible interfacing to the wrong side of the fabric.
 Place the fabric right side up inside the shirt (because you'll be cutting the shirt away and don't want to see interfacing!)
 Put lots of pins in so that your fabric doesn't move around. I tried to arrange mine so that I could sew around the number without hitting or removing pins.
 Sew around your lines. I made 2 rows of lines, and made them "messy" because I liked the not perfect look better.
 All sewed:
 Now cut a little hole in the Tshirt and be sure not to cut through the 2nd fabric. Then cut next to your sewn lines leaving the patterned fabric showing through!
 The inside of the shirt looks like this, so trim around the interfacing/lining in order to remove bulk. I didn't take a picture of the inside after I did that.
 Here it is:


And look how cute it turned out for his birthday pictures! (Sorry about the edited picture, but I'm not sure I'm ready to plaster my baby's pictures all over the web)


 "
"


This turned out so good!
ReplyDeleteThanks for linking with What are little boys made of?
This is such a fun idea, I've seen something like it before, but never with such a detailed tutorial, thanks for sharing!
ReplyDeleteVisiting from The Girl Creative -- LOVE that shirt!! Too cute :)
ReplyDeleteI love this! Thank you for a wonderful tutorial and for linking to my party. Have a great weekend and I hope to see you at my party again.
ReplyDelete~Gay~
itsahodgepodgelife.blogspot.com
This is very cute, and very boyish! I love it! Thanks so much for linking up to our party this week! HOPE TO SEE YOU BACK AGAIN!
ReplyDeleteCute...I don't think I've ever really seen applique from the inside. A cute twist!
ReplyDeleteThis turned out so cute. I tried a reverse appliqué on a shirt for myself recently and loved it. I will have to try some on my daughter's shirts next.
ReplyDeleteThis is so cute! Thanks for linking. I will be featuring this.
ReplyDelete~Gay~
itsahodgepodgelife.blogspot.com